
Hey there! Get ready for an exciting journey as we embark on deploying a React JS Zomato clone. Our trusty companion on this adventure is Jenkins, serving as our CI/CD tool, while the magic happens inside a Docker container. Dive into the details in this comprehensive blog — your go-to guide for the entire process.
🚀 Explore the GitHub Repository https://github.com/NotHarshhaa/Zomato-Clone.git for all the code and resources. Happy coding, friends!
Steps:-
Step 1 — Launch an Ubuntu(22.04) T2 Large Instance
Step 2 — Install Jenkins, Docker and Trivy. Create a Sonarqube Container using Docker.
Step 3 — Install Plugins like JDK, Sonarqube Scanner, Nodejs, and OWASP Dependency Check.
Step 4 — Create a Pipeline Project in Jenkins using a Declarative Pipeline
Step 5 — Install OWASP Dependency Check Plugins
Step 6 — Docker Image Build and Push
Step 7 — Deploy the image using Docker
Step 8 — Terminate the AWS EC2 Instances.
Now, let’s get started and dig deeper into each of these steps:-
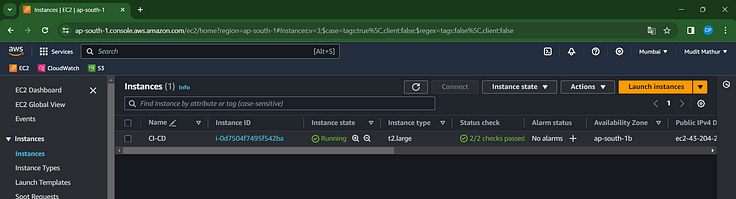
Step 1:Launch an Ubuntu(22.04) T2 Large Instance
Launch an AWS T2 Large Instance. Use the image as Ubuntu. You can create a new key pair or use an existing one. Enable HTTP and HTTPS settings in the Security Group and open all ports (not best case to open all ports but just for learning purposes it’s okay).
Step 2 — Install Jenkins, Docker and Trivy
2A — To Install Jenkins
Connect to your console, and enter these commands to Install Jenkins
vim jenkins.shCOPY
#!/bin/bash
sudo apt update -y
#sudo apt upgrade -y
wget -O - https://packages.adoptium.net/artifactory/api/gpg/key/public | tee /etc/apt/keyrings/adoptium.asc
echo "deb [signed-by=/etc/apt/keyrings/adoptium.asc] https://packages.adoptium.net/artifactory/deb $(awk -F= '/^VERSION_CODENAME/{print$2}' /etc/os-release) main" | tee /etc/apt/sources.list.d/adoptium.list
sudo apt update -y
sudo apt install temurin-17-jdk -y
/usr/bin/java --version
curl -fsSL https://pkg.jenkins.io/debian-stable/jenkins.io-2023.key | sudo tee \
                  /usr/share/keyrings/jenkins-keyring.asc > /dev/null
echo deb [signed-by=/usr/share/keyrings/jenkins-keyring.asc] \
                  https://pkg.jenkins.io/debian-stable binary/ | sudo tee \
                              /etc/apt/sources.list.d/jenkins.list > /dev/null
sudo apt-get update -y
sudo apt-get install jenkins -y
sudo systemctl start jenkins
sudo systemctl status jenkins
sudo chmod 777 jenkins.sh
./jenkins.sh # this will installl jenkinsOnce Jenkins is installed, you will need to go to your AWS EC2 Security Group and open Inbound Port 8080, since Jenkins works on Port 8080.
Now, grab your Public IP Address
<EC2 Public IP Address:8080>
sudo cat /var/lib/jenkins/secrets/initialAdminPassword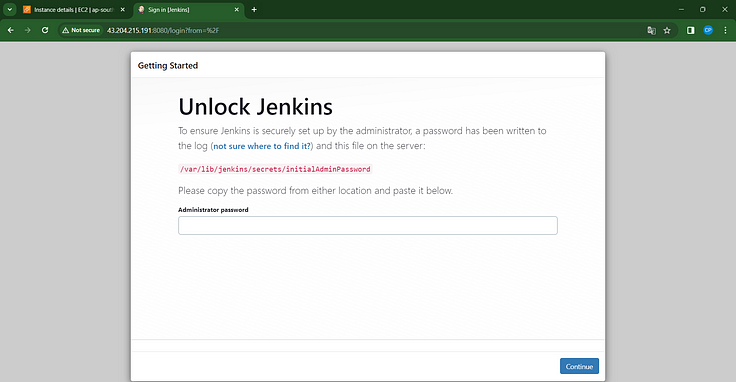
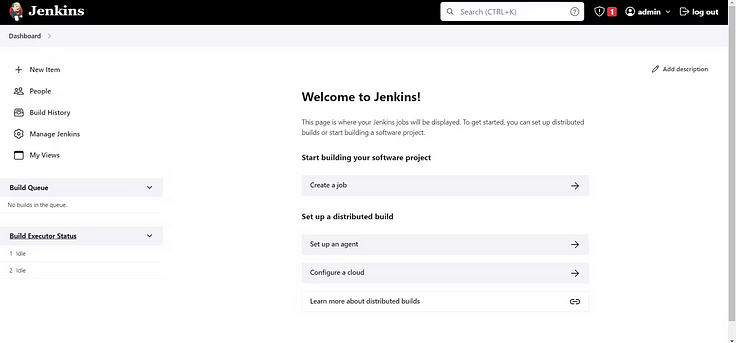
Unlock Jenkins using an administrative password and install the suggested plugins.
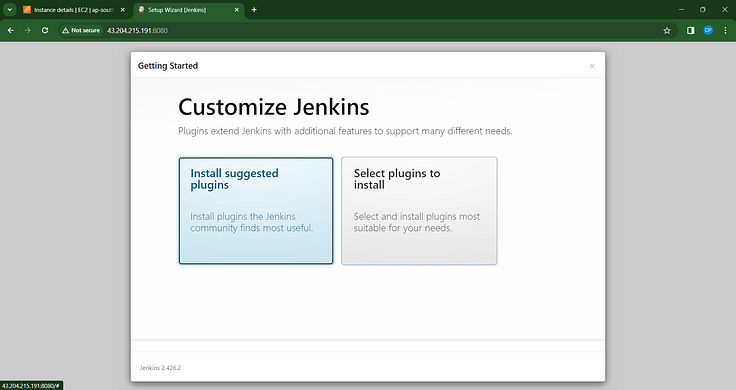
Jenkins will now get installed and install all the libraries.
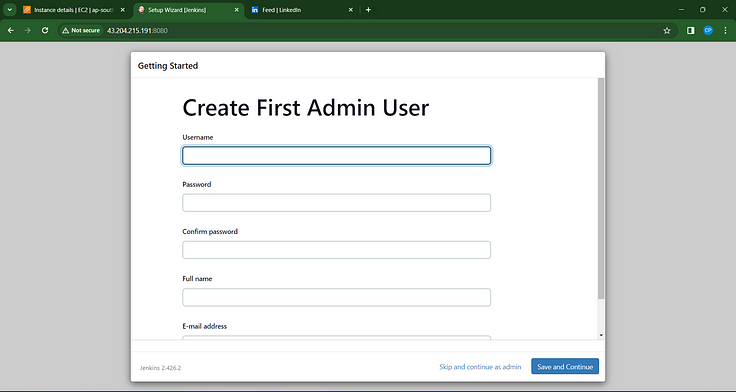
Create a user click on save and continue.
Jenkins Getting Started Screen.
2B — Install Docker
sudo apt-get update
sudo apt-get install docker.io -y
sudo usermod -aG docker $USER   #my case is ubuntu
newgrp docker
sudo chmod 777 /var/run/docker.sock
After the docker installation, we create a sonarqube container (Remember to add 9000 ports in the security group).
docker run -d --name sonar -p 9000:9000 sonarqube:lts-community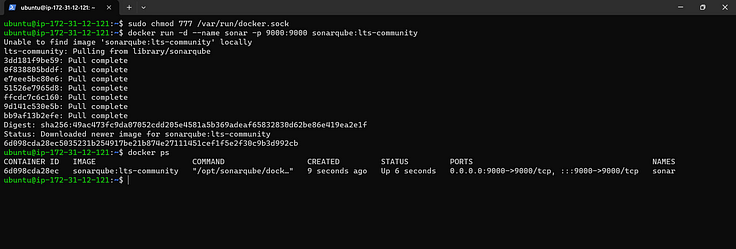
Now our sonarqube is up and running
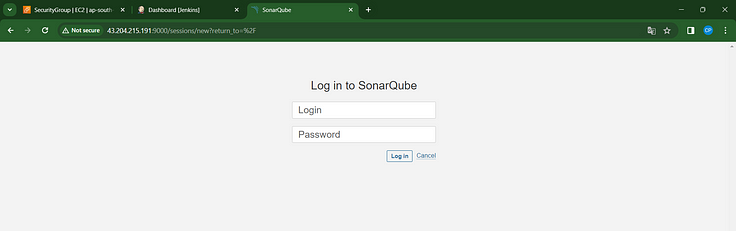
Enter username and password, click on login and change password
username admin
password admin
Update New password, This is Sonar Dashboard.
2C — Install Trivy
vim trivy.shsudo apt-get install wget apt-transport-https gnupg lsb-release -y
wget -qO - https://aquasecurity.github.io/trivy-repo/deb/public.key | gpg --dearmor | sudo tee /usr/share/keyrings/trivy.gpg > /dev/null
echo "deb [signed-by=/usr/share/keyrings/trivy.gpg] https://aquasecurity.github.io/trivy-repo/deb $(lsb_release -sc) main" | sudo tee -a /etc/apt/sources.list.d/trivy.list
sudo apt-get update
sudo apt-get install trivy -yNext, we will log in to Jenkins and start to configure our Pipeline in Jenkins
Step 3 — Install Plugins like JDK, Sonarqube Scanner, NodeJs, OWASP Dependency Check
3A — Install Plugin
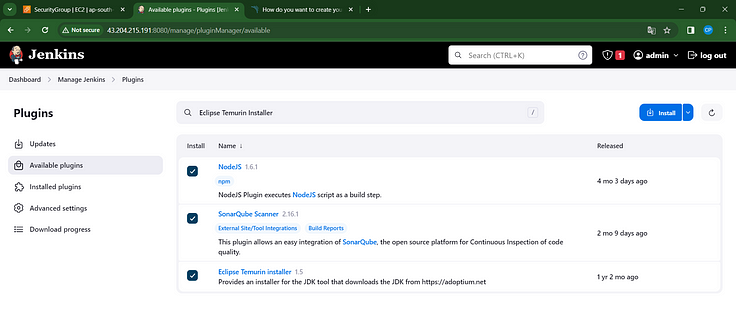
Goto Manage Jenkins →Plugins → Available Plugins →
Install below plugins
1 → Eclipse Temurin Installer (Install without restart)
2 → SonarQube Scanner (Install without restart)
3 → NodeJs Plugin (Install Without restart)
3B — Configure Java and Nodejs in Global Tool Configuration
Goto Manage Jenkins → Tools → Install JDK(17) and NodeJs(16)→ Click on Apply and Save
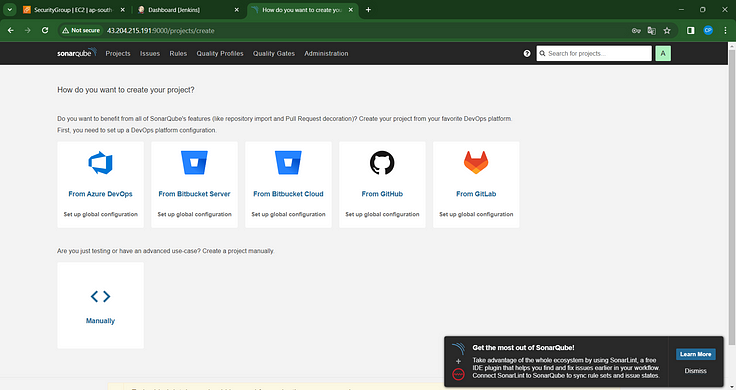
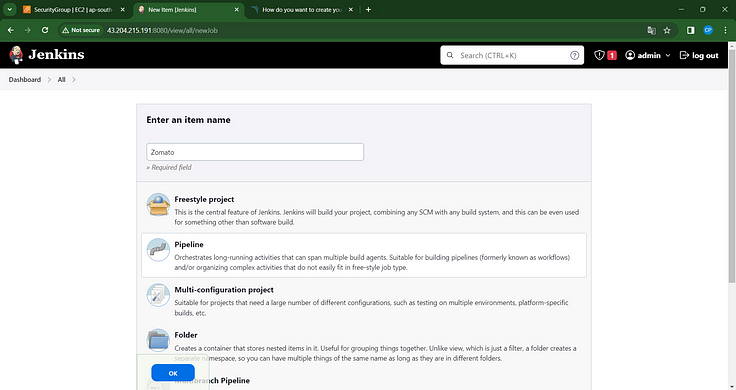
3C — Create a Job
Create a job as Zomato Name, select pipeline and click on ok.
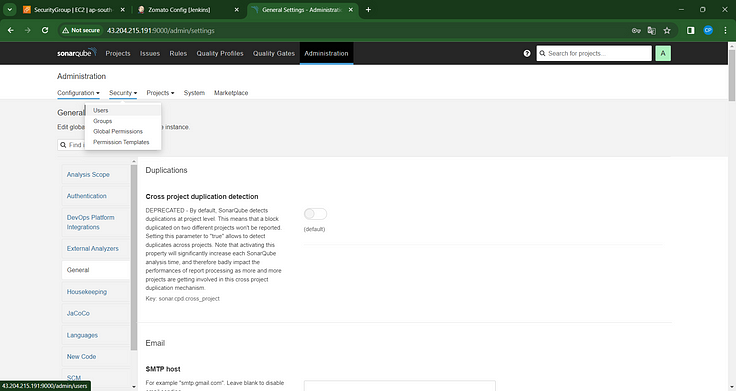
Step 4 — Configure Sonar Server in Manage Jenkins
Grab the Public IP Address of your EC2 Instance, Sonarqube works on Port 9000, so <Public IP>:9000. Goto your Sonarqube Server. Click on Administration → Security → Users → Click on Tokens and Update Token → Give it a name → and click on Generate Token
click on update Token
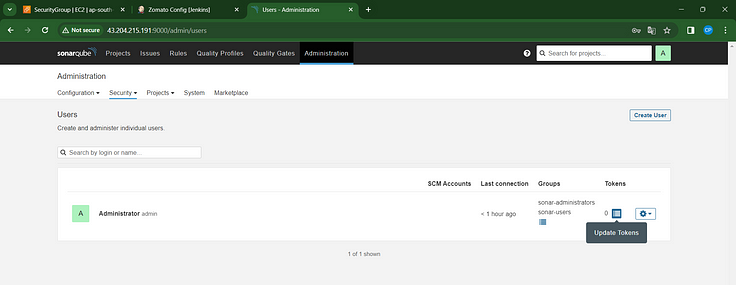
Create a token with a name and generate
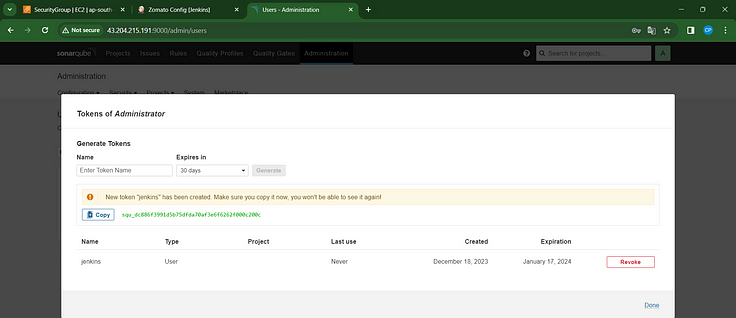
copy Token
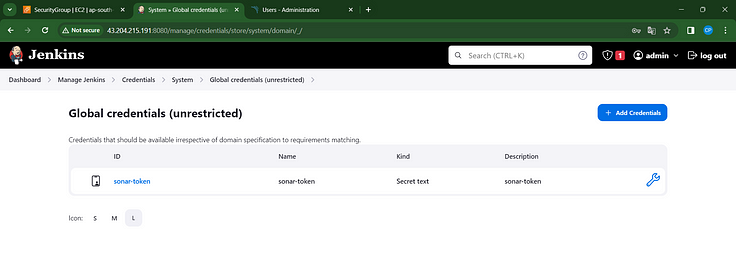
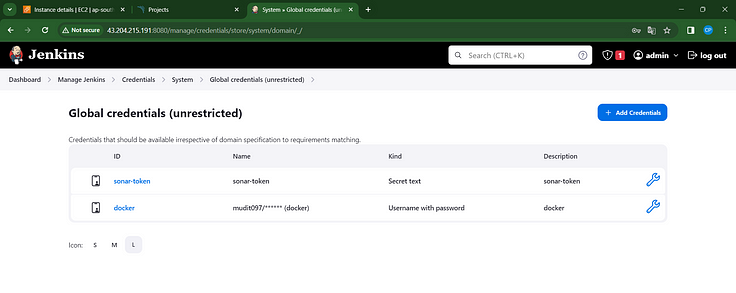
Goto Jenkins Dashboard → Manage Jenkins → Credentials → Add Secret Text. It should look like this

You will this page once you click on create
Now, go to Dashboard → Manage Jenkins → System and Add like the below image.
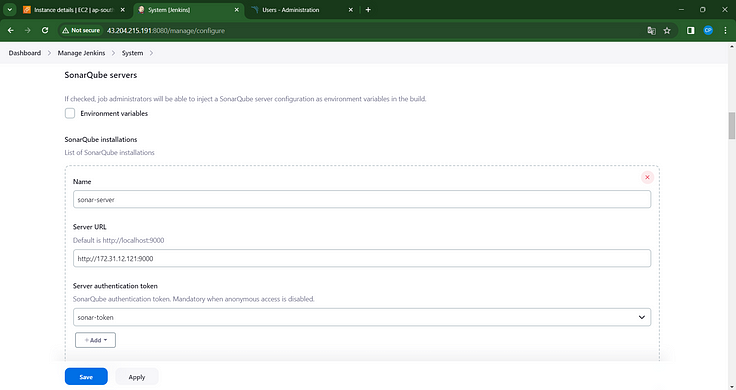
Click on Apply and Save
The Configure System option is used in Jenkins to configure different server
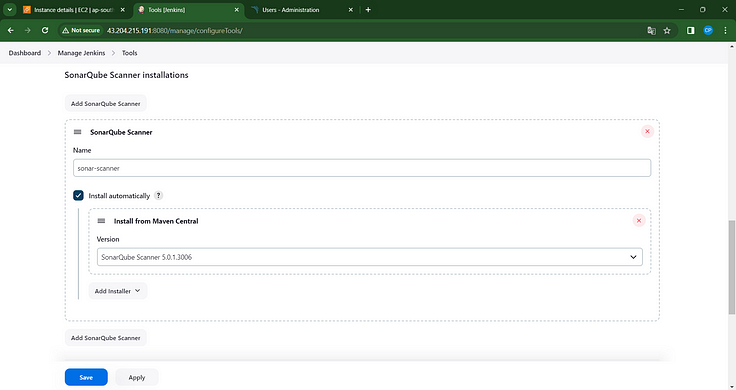
Global Tool Configuration is used to configure different tools that we install using Plugins
We will install a sonar scanner in the tools.
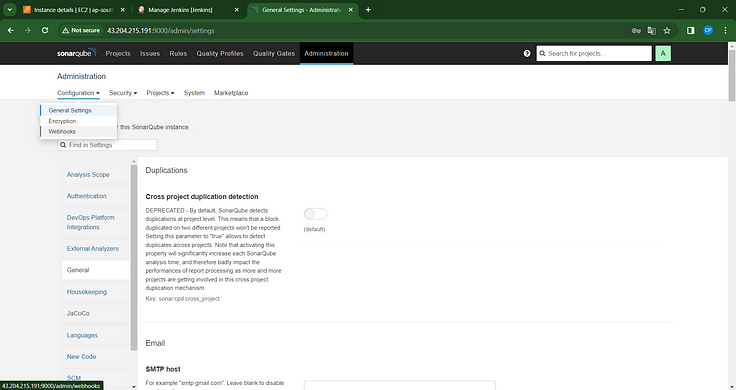
In the Sonarqube Dashboard add a quality gate also
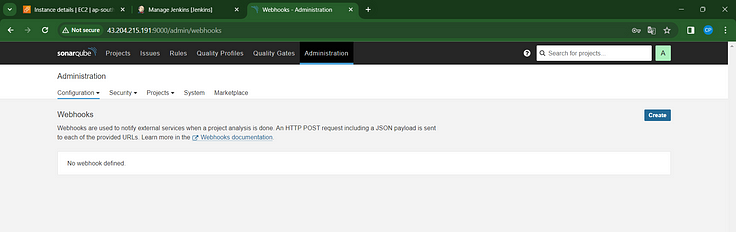
Administration → Configuration →Webhooks
Click on Create
Add details
#in url section of quality gate
<http://jenkins-public-ip:8080>/sonarqube-webhook/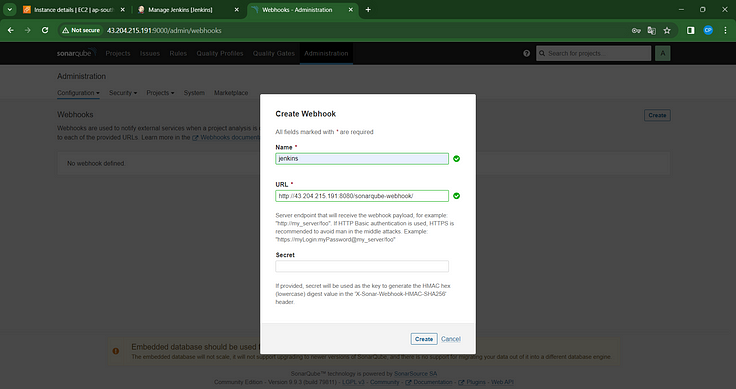
Let’s go to our Pipeline and add the script in our Pipeline Script.
pipeline{
agent any
tools{
jdk 'jdk17'
nodejs 'node16'
}
environment {
SCANNER_HOME=tool 'sonar-scanner'
}
stages {
stage('clean workspace'){
steps{
cleanWs()
}
}
stage('Checkout from Git'){
steps{
git branch: 'main', url: 'https://github.com/NotHarshhaa/Zomato-Clone.git'
}
}
stage("Sonarqube Analysis "){
steps{
withSonarQubeEnv('sonar-server') {
sh ''' $SCANNER_HOME/bin/sonar-scanner -Dsonar.projectName=zomato \
-Dsonar.projectKey=zomato '''
}
}
}
stage("quality gate"){
steps {
script {
waitForQualityGate abortPipeline: false, credentialsId: 'Sonar-token'
}
}
}
stage('Install Dependencies') {
steps {
sh "npm install"
}
}
}
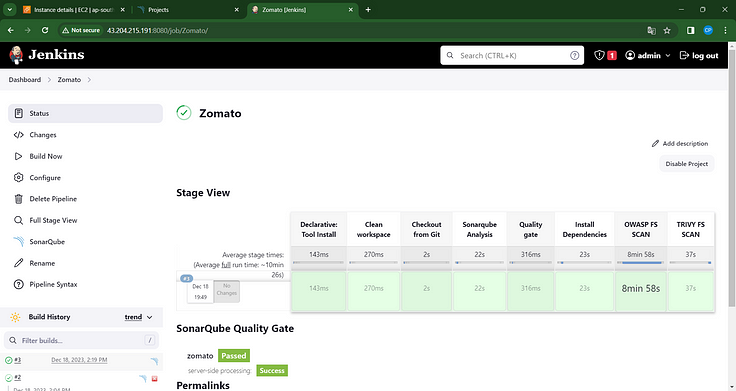
}Click on Build now, you will see the stage view like this
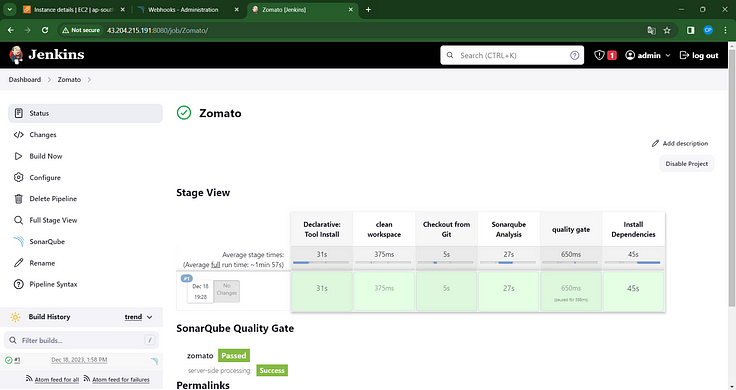
To see the report, you can go to Sonarqube Server and go to Projects.

You can see the report has been generated and the status shows as passed. You can see that there are 1.3k lines. To see a detailed report, you can go to issues.
Step 5 — Install OWASP Dependency Check Plugins
GotoDashboard → Manage Jenkins → Plugins → OWASP Dependency-Check. Click on it and install it without restart.
First, we configured the Plugin and next, we had to configure the Tool
Goto Dashboard → Manage Jenkins → Tools →
Click on Apply and Save here.
Now go configure → Pipeline and add this stage to your pipeline and build.
stage('OWASP FS SCAN') {
steps {
dependencyCheck additionalArguments: '--scan ./ --disableYarnAudit --disableNodeAudit', odcInstallation: 'DP-Check'
dependencyCheckPublisher pattern: '**/dependency-check-report.xml'
}
}
stage('TRIVY FS SCAN') {
steps {
sh "trivy fs . > trivyfs.txt"
}
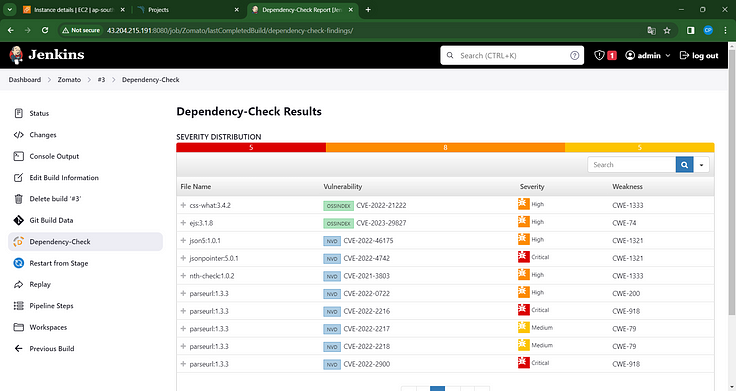
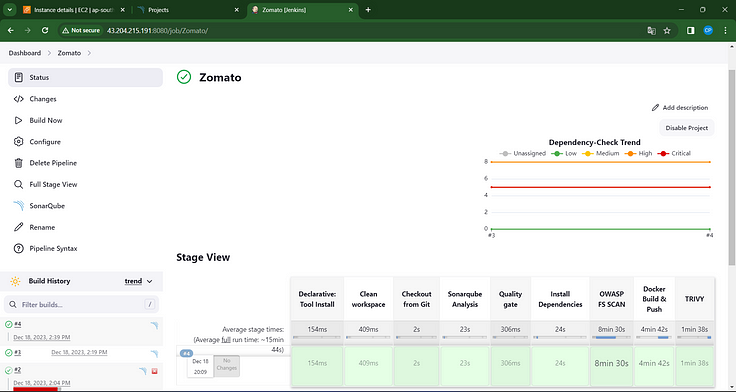
}The stage view would look like this,
You will see that in status, a graph will also be generated and Vulnerabilities.
Step 6 — Docker Image Build and Push
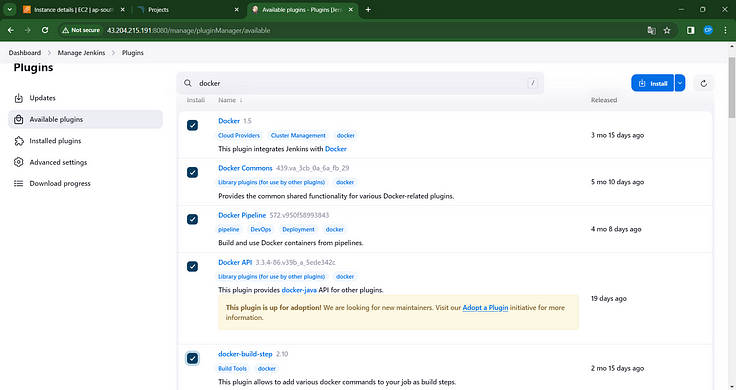
We need to install the Docker tool in our system, Goto Dashboard → Manage Plugins → Available plugins → Search for Docker and install these plugins
Docker
Docker Commons
Docker Pipeline
Docker API
docker-build-step
and click on install without restart
Now, goto Dashboard → Manage Jenkins → Tools →
Add DockerHub Username and Password under Global Credentials

Add this stage to Pipeline Script
        stage("Docker Build & Push"){
            steps{
                script{
                   withDockerRegistry(credentialsId: 'docker', toolName: 'docker'){
                       sh "docker build -t zomato ."
                       sh "docker tag zomato NotHarshhaa/zomato:latest "
                       sh "docker push NotHarshhaa/zomato:latest "
                    }
                }
            }
        }
        stage("TRIVY"){
            steps{
                sh "trivy image NotHarshhaa/zomato:latest > trivy.txt"
            }
        }
You will see the output below, with a dependency trend.
When you log in to Dockerhub, you will see a new image is created
Now Run the container to see if the app coming up or not by adding the below stage
stage('Deploy to container'){
steps{
sh 'docker run -d --name zomato -p 3000:3000 NotHarshhaa/zomato:latest'
}
}
stage view
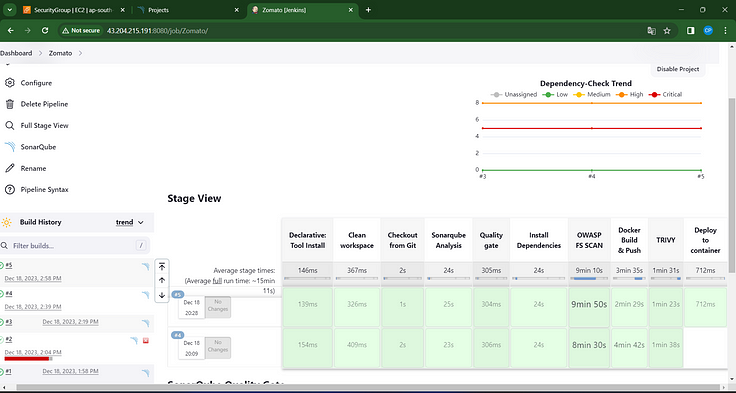
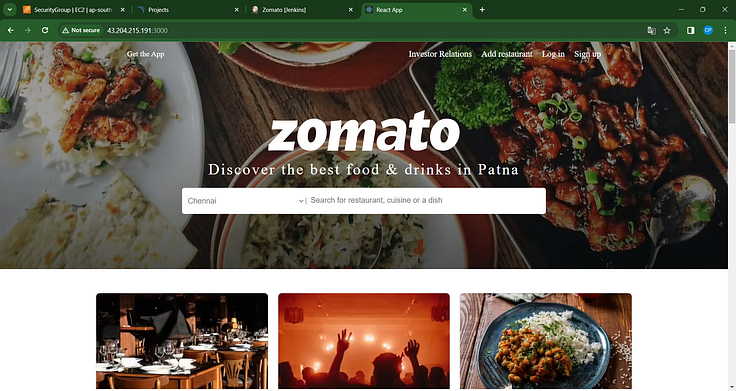
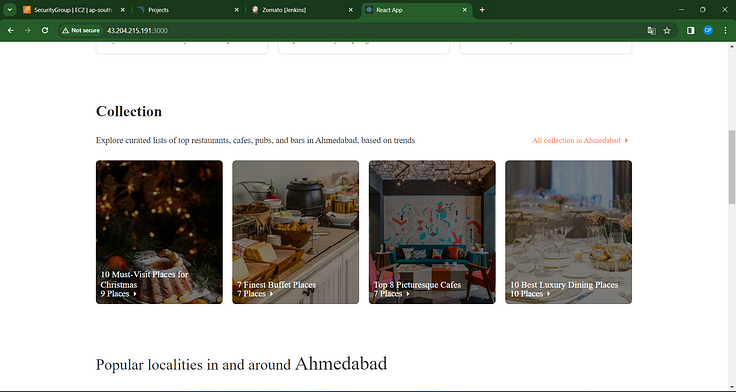
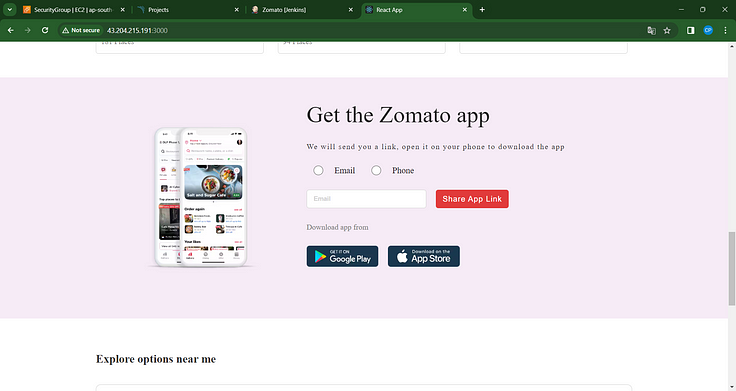
<Jenkins-public-ip:3000>
You will get this output
Step 8: Terminate instances.
Efficiently manage resources by terminating the AWS EC2 Instances to ensure cost-effectiveness and environmental responsibility, completing the deployment lifecycle. Utilize AWS management tools or commands to gracefully shut down and terminate the Ubuntu(22.04) T2 Large Instance, concluding the deployment process while maintaining operational efficiency.
Complete Pipeline
pipeline{
    agent any
    tools{
        jdk 'jdk17'
        nodejs 'node16'
    }
    environment {
        SCANNER_HOME=tool 'sonar-scanner'
    }
    stages {
        stage('clean workspace'){
            steps{
                cleanWs()
            }
        }
        stage('Checkout from Git'){
            steps{
                git branch: 'main', url: 'https://github.com/NotHarshhaa/Zomato-Clone.git'
            }
        }
        stage("Sonarqube Analysis "){
            steps{
                withSonarQubeEnv('sonar-server') {
                    sh ''' $SCANNER_HOME/bin/sonar-scanner -Dsonar.projectName=zomato \
                    -Dsonar.projectKey=zomato '''
                }
            }
        }
        stage("quality gate"){
           steps {
                script {
                    waitForQualityGate abortPipeline: false, credentialsId: 'Sonar-token'
                }
            }
        }
        stage('Install Dependencies') {
            steps {
                sh "npm install"
            }
        }
        stage('OWASP FS SCAN') {
            steps {
                dependencyCheck additionalArguments: '--scan ./ --disableYarnAudit --disableNodeAudit', odcInstallation: 'DP-Check'
                dependencyCheckPublisher pattern: '**/dependency-check-report.xml'
            }
        }
        stage('TRIVY FS SCAN') {
            steps {
                sh "trivy fs . > trivyfs.txt"
            }
        }
        stage("Docker Build & Push"){
            steps{
                script{
                   withDockerRegistry(credentialsId: 'docker', toolName: 'docker'){
                       sh "docker build -t zomato ."
                       sh "docker tag zomato NotHarshhaa/zomato:latest "
                       sh "docker push NotHarshhaa/zomato:latest "
                    }
                }
            }
        }
        stage("TRIVY"){
            steps{
                sh "trivy image NotHarshhaa/zomato:latest > trivy.txt"
            }
        }
        stage('Deploy to container'){
            steps{
                sh 'docker run -d --name zomato -p 3000:3000 NotHarshhaa/zomato:latest'
            }
        }
    }
}
In conclusion, this comprehensive guide has walked you through the essential steps to set up a robust and efficient CI/CD pipeline on an Ubuntu 22.04 T2 Large Instance using Jenkins, Docker, and Trivy. From the initial launch of the AWS EC2 instance to the installation of critical tools such as Jenkins, Docker, and Trivy, as well as the creation of a Sonarqube container, each step has been meticulously covered.
The integration of essential plugins like JDK, Sonarqube Scanner, Nodejs, and OWASP Dependency Check further enhances the pipeline’s capabilities. The creation of a Declarative Pipeline in Jenkins streamlines the development process, and the incorporation of OWASP Dependency Check Plugins fortifies security measures.
The guide concludes with the crucial steps of Docker image build, push, deployment, and, ultimately, the termination of AWS EC2 instances, ensuring a seamless and controlled workflow. By following these steps, you’ve not only established a powerful CI/CD pipeline but also prioritized security and efficiency throughout the entire development lifecycle.
Author by:

Join Our Telegram Community || Follow me for more DevOps Content