What Is Terragrunt?
Terragrunt is an open source tool developed by Grunt Work that helps to reduce code duplication across your Terraform projects - effectively keeping your terraform code DRY.
DRY is a popular acronym which means Do not Repeat Yourself.
Terragrunt can be used to manage Terraform code across multiple environments, multiple AWS accounts, handling dependency management, custom actions and versioning.
Terragrunt simplifies the management of multiple environments by providing a clear separation between them.
Terragrunt hooks can be used to perform actions before or after Terraform commands.
Terragrunt can be integrated with your CI/CD pipelines for automated infrastructure deployment.
Terragrunt is able to integrate with external secret management tools like Hashicorp Vault or AWS Secrets Manager for managing sensitive data.
In fact, you can use Terragrunt commands in place of basic terraform commands.
-
terragrunt init
-
terragrunt plan
-
terragrunt apply
-
terragrunt output
-
terragrunt destroy
Terragrunt lets you specify the IAM role to use. You can do this by using the _--terragrunt-iam-role_ CLI argument or the TERRAGRUNT_IAM_ROLE environmental variable. Terragrunt will call the sts-assume-role API and then expose the credentials it receives as environmental variables when invoking terraform. This makes it possible to seamlessly deploy infrastructure across different environments without having to store AWS credentials in plaintext.
Installing Terragrunt
To install terragrunt, make sure you have alredy installed terraform beforehand.
-
Follow this link to install terraform.
-
Download the Terragrunt binary from the releases page.
-
Select the correct binary for your OS.
-
Copy the link and download on your terminal using the wget command. Example:
wgethttps://github.com/gruntwork-io/terragrunt/releases/download/v0.54.19/terragrunt_linux_amd64 -
Rename the binary to terragrunt:
mv terragrunt_linux_amd64 terragrunt -
Make the file executable:
chmod u+x terragrunt -
Move the file to the
/usr/local/bindirectory: `sudo mv terragrunt /usr/local/bin/terragrunt’ -
To verify your installation, run:
terragrunt --version.
A Case Study
Let us now present a scenario for managing infrastructure with Terragrunt.
The following is a sample terraform code for creating an EC2 instance using Terraform.
terraform {
  required_providers {
    aws = {
      source  = "hashicorp/aws"
      version = "~> 4.16"
    }
  }

  required_version = ">= 1.2.0"
}

provider "aws" {
  region = "us-west-2"
}

resource "aws_instance" "app_server" {
  ami           = "ami-830c94e3"
  instance_type = "t2.micro"

  tags = {
    Name = "ExampleAppServerInstance"
  }
}
The problem is, how do you create this instance across several environments?
Ordinarily, you would want to duplicate the same code for each environment and then modify the parameters.
You might wish to specify different instance types for each environment. For example, you might want to use a t2.micro instance for development environment, a t3.medium for test environment and a t2.large for production.
The problem is that this would be a very manual process -inefficient and leaves plenty room for error. Using Terragrunt, we can improve this code without having to copy and paste the code across several environments.
Also these environments might be spread out across different AWS accounts and you’d also have to worry about managing the different AWS credentials and IAM roles required.
The terraform backend does not support variables or any type of expression whatsoever. So you would have to manually copy and edit the backend configuration code for each of the environments.
Working With Terragrunt
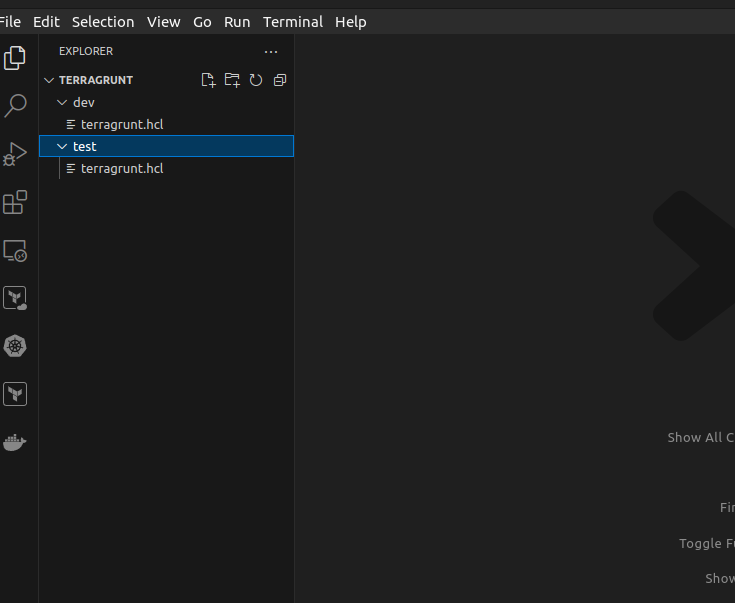
First we need to create separate directories for each of the environments. In each of the directories, a terragrunt.hcl file will be created. This is the configuration file for each of the environments.
Your directory structure should look like this:
First, we have to define a terraform block and declare the source of our EC2 module.
terraform {
  source = "terraform-aws-modules/ec2-instance/aws"
  version = "5.6.0"
}

# Now let's define a provider.
provider "aws" {
  profile = "default"
  region  = "us-east-1"
}
terraform {
source = "tfr:///terraform-aws-modules/ec2-instance/aws?version=5.6.0"
}
generate "provider" {
path = "provider.tf"
if_exists = "overwrite_terragrunt"
contents = <<EOF
provider "aws" {
profile = "default"
region = "us-east-1"
}
EOF
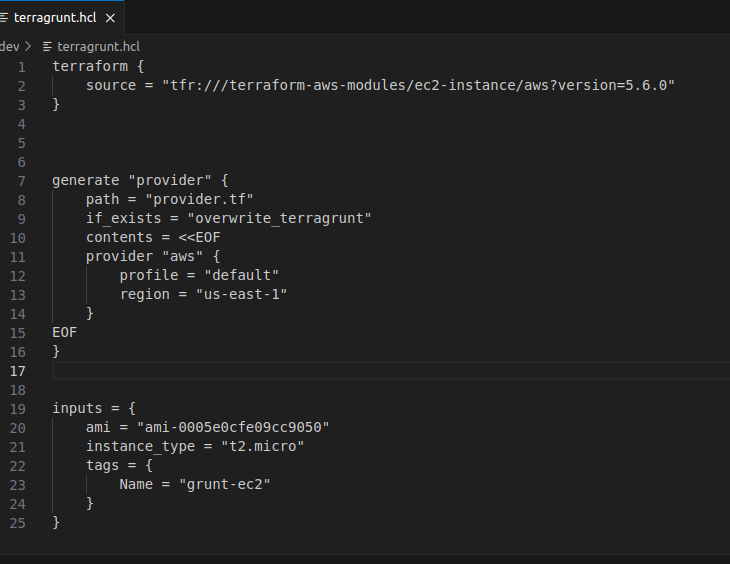
}Now we need to declare an inputs block. This is where most of the magic of Terragrunt happens.
we can simply define one terraform code for all our environments and then use the inputs block to change values as required across all the environments.
inputs = { ami = "ami-0005e0cfe09cc9050" instance_type = "t2.micro" tags = { Name = "grunt-ec2" } }
What is happening here is that the instance type, ami and tags are values that are intended to differ based on the environment.
My terragrunt.hcl file now looks like this:
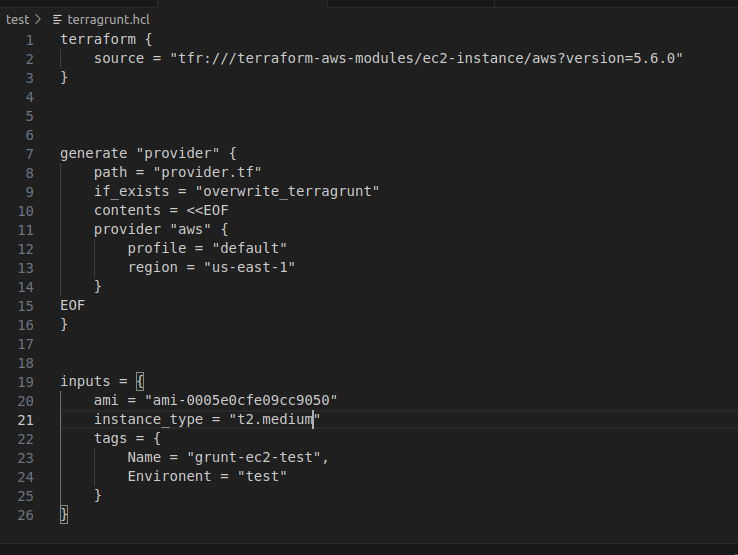
I have replicated this in my test directory with a few changes. The instance type is t2.medium, the tags have also been modified to reflect the environment.
The terragrunt.hcl file in my test environment looks like this:
The next stage is to execute Terragrunt commands to read our configuration and invoke terraform with it.
-
Switch to the
devdirectory. -
First, run
terragrunt init. -
Now run
terragrunt planto see proposed infrastructure changes. This is how mine looks:
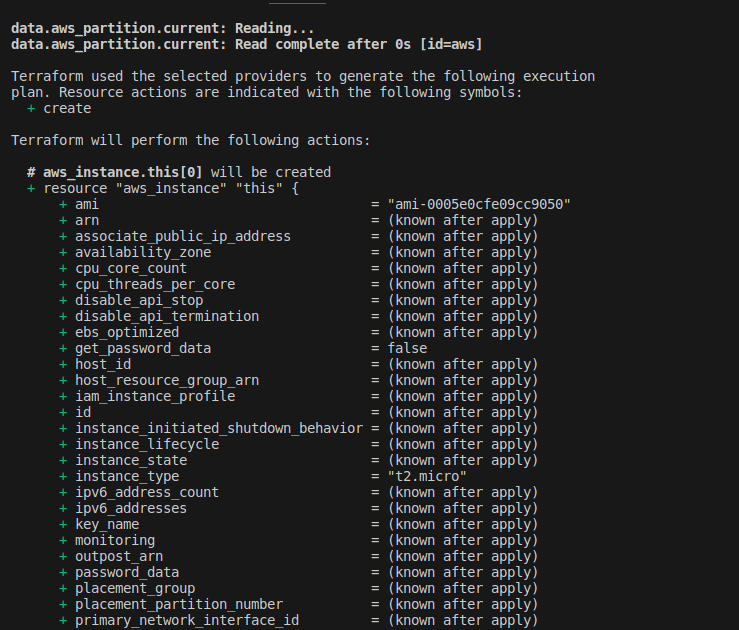
- Run
terragrunt applyto actually create the instance.
Repeat the steps above for the test environment.
Final Thoughts
If you followed this tutorial until now, I’m sure you must have begun to see the importance of Terragrunt and how it helps manage terraform code across different environments while keeping your terraform code DRY.
If you find this article helpful then you can buy me a coffee.
Follow for more stories like this 😊/ GitHub.